Are you the in-house horticultural grim reaper to your houseplants? Do you constantly forget to water, only to find your sad looking and neglected living centerpiece knocking on death’s door? Then you’re in luck! Succulent terrariums are not only low-maintenance, but they’re good looking, too. You can neglect these guys for weeks and they won’t mind a bit. Consider them the red-headed step-children of the plant world, who have figured out how to get by just fine by themselves, thank you.
You know all those dainty little precious glass vases and bowls you got as wedding gifts that spend most of their time tucked away in a cabinet? The time has come to spritz those suckers with glass cleaner and fill ’em with dirt and rocks. Check out these terrariums, created with average glass jars, rocks, dirt, and a few succulents from Lowe’s. These are easy to do, and the best part is that they don’t require much maintenance (translation: they are black thumb-friendly). Read on for more pics and the DIY instructions below.
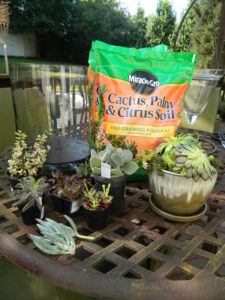
- 1 bag your choice of rocks
- 1 bag fast-draining cactus soil
- a few succulents (about $2 – $5 each)*
- glass containers (I’ll bet you have some in your cabinets. But if not, hit up your nearest craft store and get some cheap ones.)
*However many succulents you purchase, make sure you get a nice assortment of heights and shapes. Your masterpiece will be pretty boring if all the plants look the same.
Step 1: Get clean before you get dirty. The first thing you want to do is to rinse out your containers and give them a once-over with glass cleaner. For these terrariums to look their best you should have the glass as clean as possible.
Step 2: Add a layer of rocks. You can see in my terrariums that I made 3 layers: rock, then dirt, then rock again. Keep in mind that you want to keep your layers relatively the same size, so be sure to leave yourself enough room.
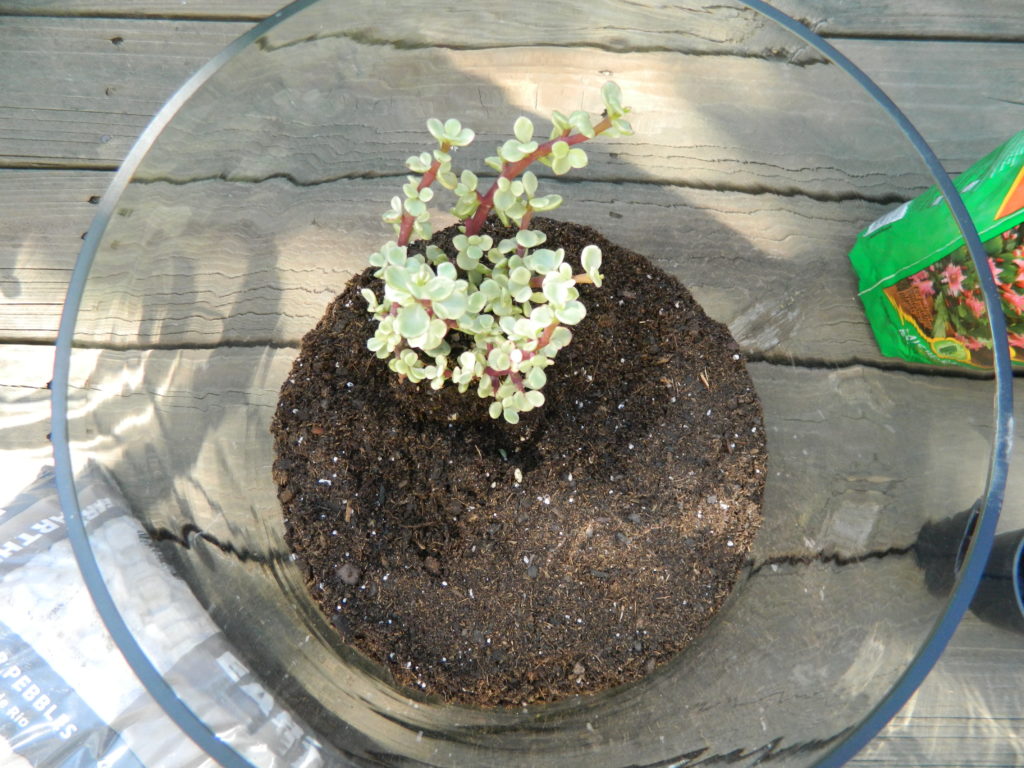
Step 3: Add the dirt. Next comes your layer of dirt. Again, stop and eyeball it as you go so that you keep the layer the same size as the rock layer below.
Step 4: Place your plants. Here is the fun part: you get to arrange your succulents where you want them to sit. We do this here before adding the last layer of rocks, which secures them into place. There is no right or wrong here and succulents look pretty good no matter how you arrange them. My suggestion is to put a taller one in the back, and to not put ones that are too similar side by side. The difference in shapes and styles keep things interesting. *Tip: to easily get the succulents out of their plastic containers, turn the container sideways. Place one hand on the plant and the other on the container, and gently wiggle them both. They should come out with no problem.*
Step 5: Add the last layer of rocks. This last layer will lock your succulents into place.
That’s it! It’s that simple. I’ll guarantee you’ll have extra materials, like I did, so create little succulent gardens out of those, too:
And even pots you have laying around…
Very little water about once per week should keep these guys lookin’ good. Enjoy! And if you are looking for a cute shower favor idea that doubles as table decor, check out this post.


How cute!!!!! Those are great!!